Thursday, 5 September 2013

Exercise 2.2 & 2.3 (a) (b)

30.8.2013 (Week 3)
Faizah Binti Hassan (0316234)
FID - Introduction to Photography

Lecture

Shutter Speed :

  •  Duration of time that controls how long the light is exposed in the ccd
  • Fast shutter speed "freezes" the object
  • Also measured in second
  • Slow shutter speed normally used to capture movement
When fixing the shutter speed below 1/60" it is recommended for you to use tripod stand to avoid blurry / shaky  image


ISO

  • Sensitive to light
  • Then number of ISO determines the noise of the picture.

INSTRUCTIONS!
Marking Criteria: The student must capture the evidence of the Shutter’s ability to freeze fast moving objects and blur moving objects.

Exercise 2.2 : Shutter Speed

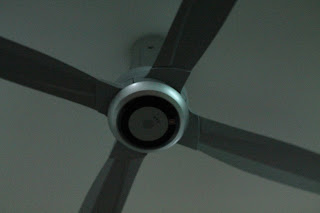
Keep the fan speed at 1 and capture images using shutter settings from 1" of a second till 1/1000th of a second. Repeat the exercise after changing the fan speed from 1 to 2 to 3 and so on.

FAN SPEED 1
 1"                    f/14                ISO 200

1/2"                    f/10                 ISO 200 

 1/4"                      f/10                 ISO 400

1/8"                      f/7.1                ISO 400

1/15"                          f/7.1                    ISO 800 
1/30"                                f/5                    ISO 800 

 1/60"                             f/5                  ISO 1600

 1/125"                             f/3.5                   ISO 1600

 1/250"                             f/3.5                  ISO 3200

 1/500:                f/2.5                ISO 3200

1/1000                         f/2.5                      ISO 6400

FAN SPEED 2
 1"                       f/14              ISO 200
 1/2"                          f/10                        ISO 200
 1/4"               f/10             ISO 400
 1/8"                  f/7.1               ISO 400
 1/15"                 f/7.1         ISO 800
 1/30"                   f/5              ISO 800
 1/125"        f/3.5              ISO 1600
 1/250"              f/3.5        ISO 3200
 1/500"               f/2.5        ISO 3200
 1/1000"            f/2.5        ISO 6400


FAN SPEED 3


1"        f/14     ISO 200

 1/2"          f/10        ISO 200

1/4"           f/10        ISO 400 
 1/8"         f/7.1        ISO 400

1/15"             f/7.1        ISO 800 

1/30"       f/5       ISO 800

1/60"           f/5        ISO 1600

1/125"          f/3.5     ISO 1600

1/250"          f/3.5          ISO 3200

1/500"             f/2.5        ISO 3200

1/1000             f/2.5              ISO 6400

INSTRUCTIONS !
Marking Criteria: The student must capture the evidence of degradation of image as the ISO increases in sensitivity. The student also must produce evidence that ISO can directly affect exposure.

Exercise 2.3 (a) 
You will be required to shoot a subject using the lowest ISO setting to the highest. Determine the right exposure (shutter speed, aperture at ISO 200) and then increase the ISO setting to 200, 400 and so on.

 ISO 200              1/125                       f.2
 ISO 400            1/125                      f.2
 ISO 800               1/125                      f.2
 ISO 1600               1/125                   f.2
 ISO 3200               1/125                   f.2

ISO 6400                1/125                 f.2

Exercise 2.3 (b)
Determine your exposure (shutter speed and aperture at ISO 200) but this time adjust the shutter speed and aperture to maintain the correct exposure as you increase the ISO.

 ISO 200                  1/100                  f.2


 ISO 400                1/200                     f.2

 ISO 800               1/400                   f.2


 ISO 1600               1/1000                 f.2


 ISO 3200              1/1200                    f.2


ISO 6400               1/4000                  f.2
SCREENSHOTS!


REFLECTION!
  • While Mr. Vinod gave the lecture on how to use the ISO and Shutter Speed, I didn't quite understand. But later after we conducted the exercise, only then I can understand how the Shutter Speed and ISO works. 
  • Basically, the ISO will have relation to the condition of light at the surroundings. 
  • The shutter speed works to freeze or create a moving-like picture. 
FEEDBACKS!
  • Must make sure to have a constant exposure
  • It's Okay if the picture is dark, as long as he can see the image
  • Change my background!!! (done)
  • Be careful with the instructions given

Wednesday, 28 August 2013

Introduction To Photography

Faizah Binti Hassan - 0316234
FID - 1st Week

FIRST DAY OF PHOTOGRAPHY CLASS!!
Lecturer : Mr Vinod Nair
Venue : Photography Studio

For the first day of our photography class, Mr Vinod briefly explained to us what we'll actually be doing for this semester. Basically he talked about the Coursework. We will be having 4 Exercises that needs to be completed by the end of this semester. Besides that, there's the Rubric in other word Marking Criteria. Then there's the Portfolio where we need to have an e-Portfolio (which im doing right now) and the documented type of portfolio (the hardcopy). Afterwards, we were given our 1st assignment which was to find 10 personal pictures and 10 pictures that was taken by a professional photographer that we like best. So, that's about it. 

Monday, 26 August 2013

Photography : Exercise 2a & 2b

23.8.2013 (week 4)
Faizah Hassan -  0316234

Exercise 2 : Exposure

Lecture 
In this exercise, Mr Vinod showed us how to use the Aperture settings. In definition, Aperture means to control the amount of light entering the lens and to also control the depth of field (clarity). Lens have a set of marked "f-stops". For example : f2, f2.8, f4....f32. The bigger the number of the Aperture, the smaller the whole in the lens and vice versa. If the Aperture hole is big, the depth of field will be blurry. 

Instruction

  1.  Use a subject that is repetitive in nature.
  2.  If you are using a zoom lens keep it fixed at 50mm.
  3.  When you mount the camera on the tripod don’t move the framing till the exercise is concluded.
  4.  The focus must be at the same point from the first image right till the last. DO NOT ADJUST IT!.
  5.  Keep a record of the settings for each image shot 
  6. Once exercise is concluded, download all images of this exercise into a folder and call it "Exercise 2a : Aperture"
Instruction - Exercise 2a
  • Student must capture any image that is repetitive in nature starting with the lowest Aperture, right exposure and maintain the ISO at 200. 
  • Start taking the photo with the lowest Aperture and gradually increase it but care to not change the shutter speed.


f/2                       1/1600                   ISO 200


 f/2.8                  1/1600                    ISO 200


f/4                      1/1600                     ISO 200


 f/5.6                 1/1600                       ISO 200


 f/8                        1/1600                     ISO 200


f/11                       1/1600                          ISO 200


f/16                            1/1600                  ISO 200


f/22                         1/1600                 ISO 200


Instruction -Exercise 2b
  • Take picture using the right exposure, different Aperture and adjust the shutter speed.
f/2                   1/1600               ISO 200


f/2.8                      1/800                    ISO 200


f/4                           1/400                   ISO 200


f/5.6                        1/200               ISO 200


f/8                         1/100                         ISO 200


f/11                           1/50                      ISO 200


f/16                               1/25                    ISO 200


f/22                            1/13                         ISO 200

* Sorry for the 1st photo, I noticed that I didn't focus on the object right after I got home. 
FEEDBACK!
  • Focus my picture
  • Write down instructions for every exercise


Reflection

For this exercise, I've learnt how to control the Aperture, Shutter Speed, Exposure and the ISO. I know understand that by choosing certain aperture, it will give out different type of clarity. While I was conducting this exercise, I was using a tripod stand. This is because the combination of the ISO, Shutter Speed and the Aperture that I used might make my image looks a lil bit shaky. I didn't know that by putting a little weight on the tripod stand can destroy my picture. So, I was told by Mr. Vinod to not lean, press or even move the tripod stand for it will make my image look blurry. 

So, basically. That's what I've learnt for this Exercise. Below is the screenshot of my folio.